Connect newrelic
New Relic helps you understand the intricacies of your software in action. By collecting and analyzing data across your applications, infrastructure, and customer interactions, New Relic transforms complex metrics into actionable insights. These insights empower your teams to identify performance bottlenecks, optimize resource utilization, and enhance the overall user experience.
Features
New Relic provides a unified platform for observability, offering visibility into application performance, infrastructure health, user experience, and business metrics. This comprehensive approach helps teams gain a holistic understanding of their entire technology stack realtime.
Overview
The process of integrating azure services in onepane requires the following:
- Create a API key for onepane in newrelic
- Create a Ingest license for onepane in newrelic
- Get the stated keys and place it in onepane
Steps
here's a step-by-step guide on how to create an API key and Ingest license for getting newrelic datas into onepane.
Step 1: Sign in to the Newrelic Portal
- Open your web browser and navigate to the Newrelic Portal.
- Sign in with your Newlrelic credentials.
Step 2: Navigate to the API keys section
In the Newrelic Portal, click on "Profile" menu from the left sidebar.
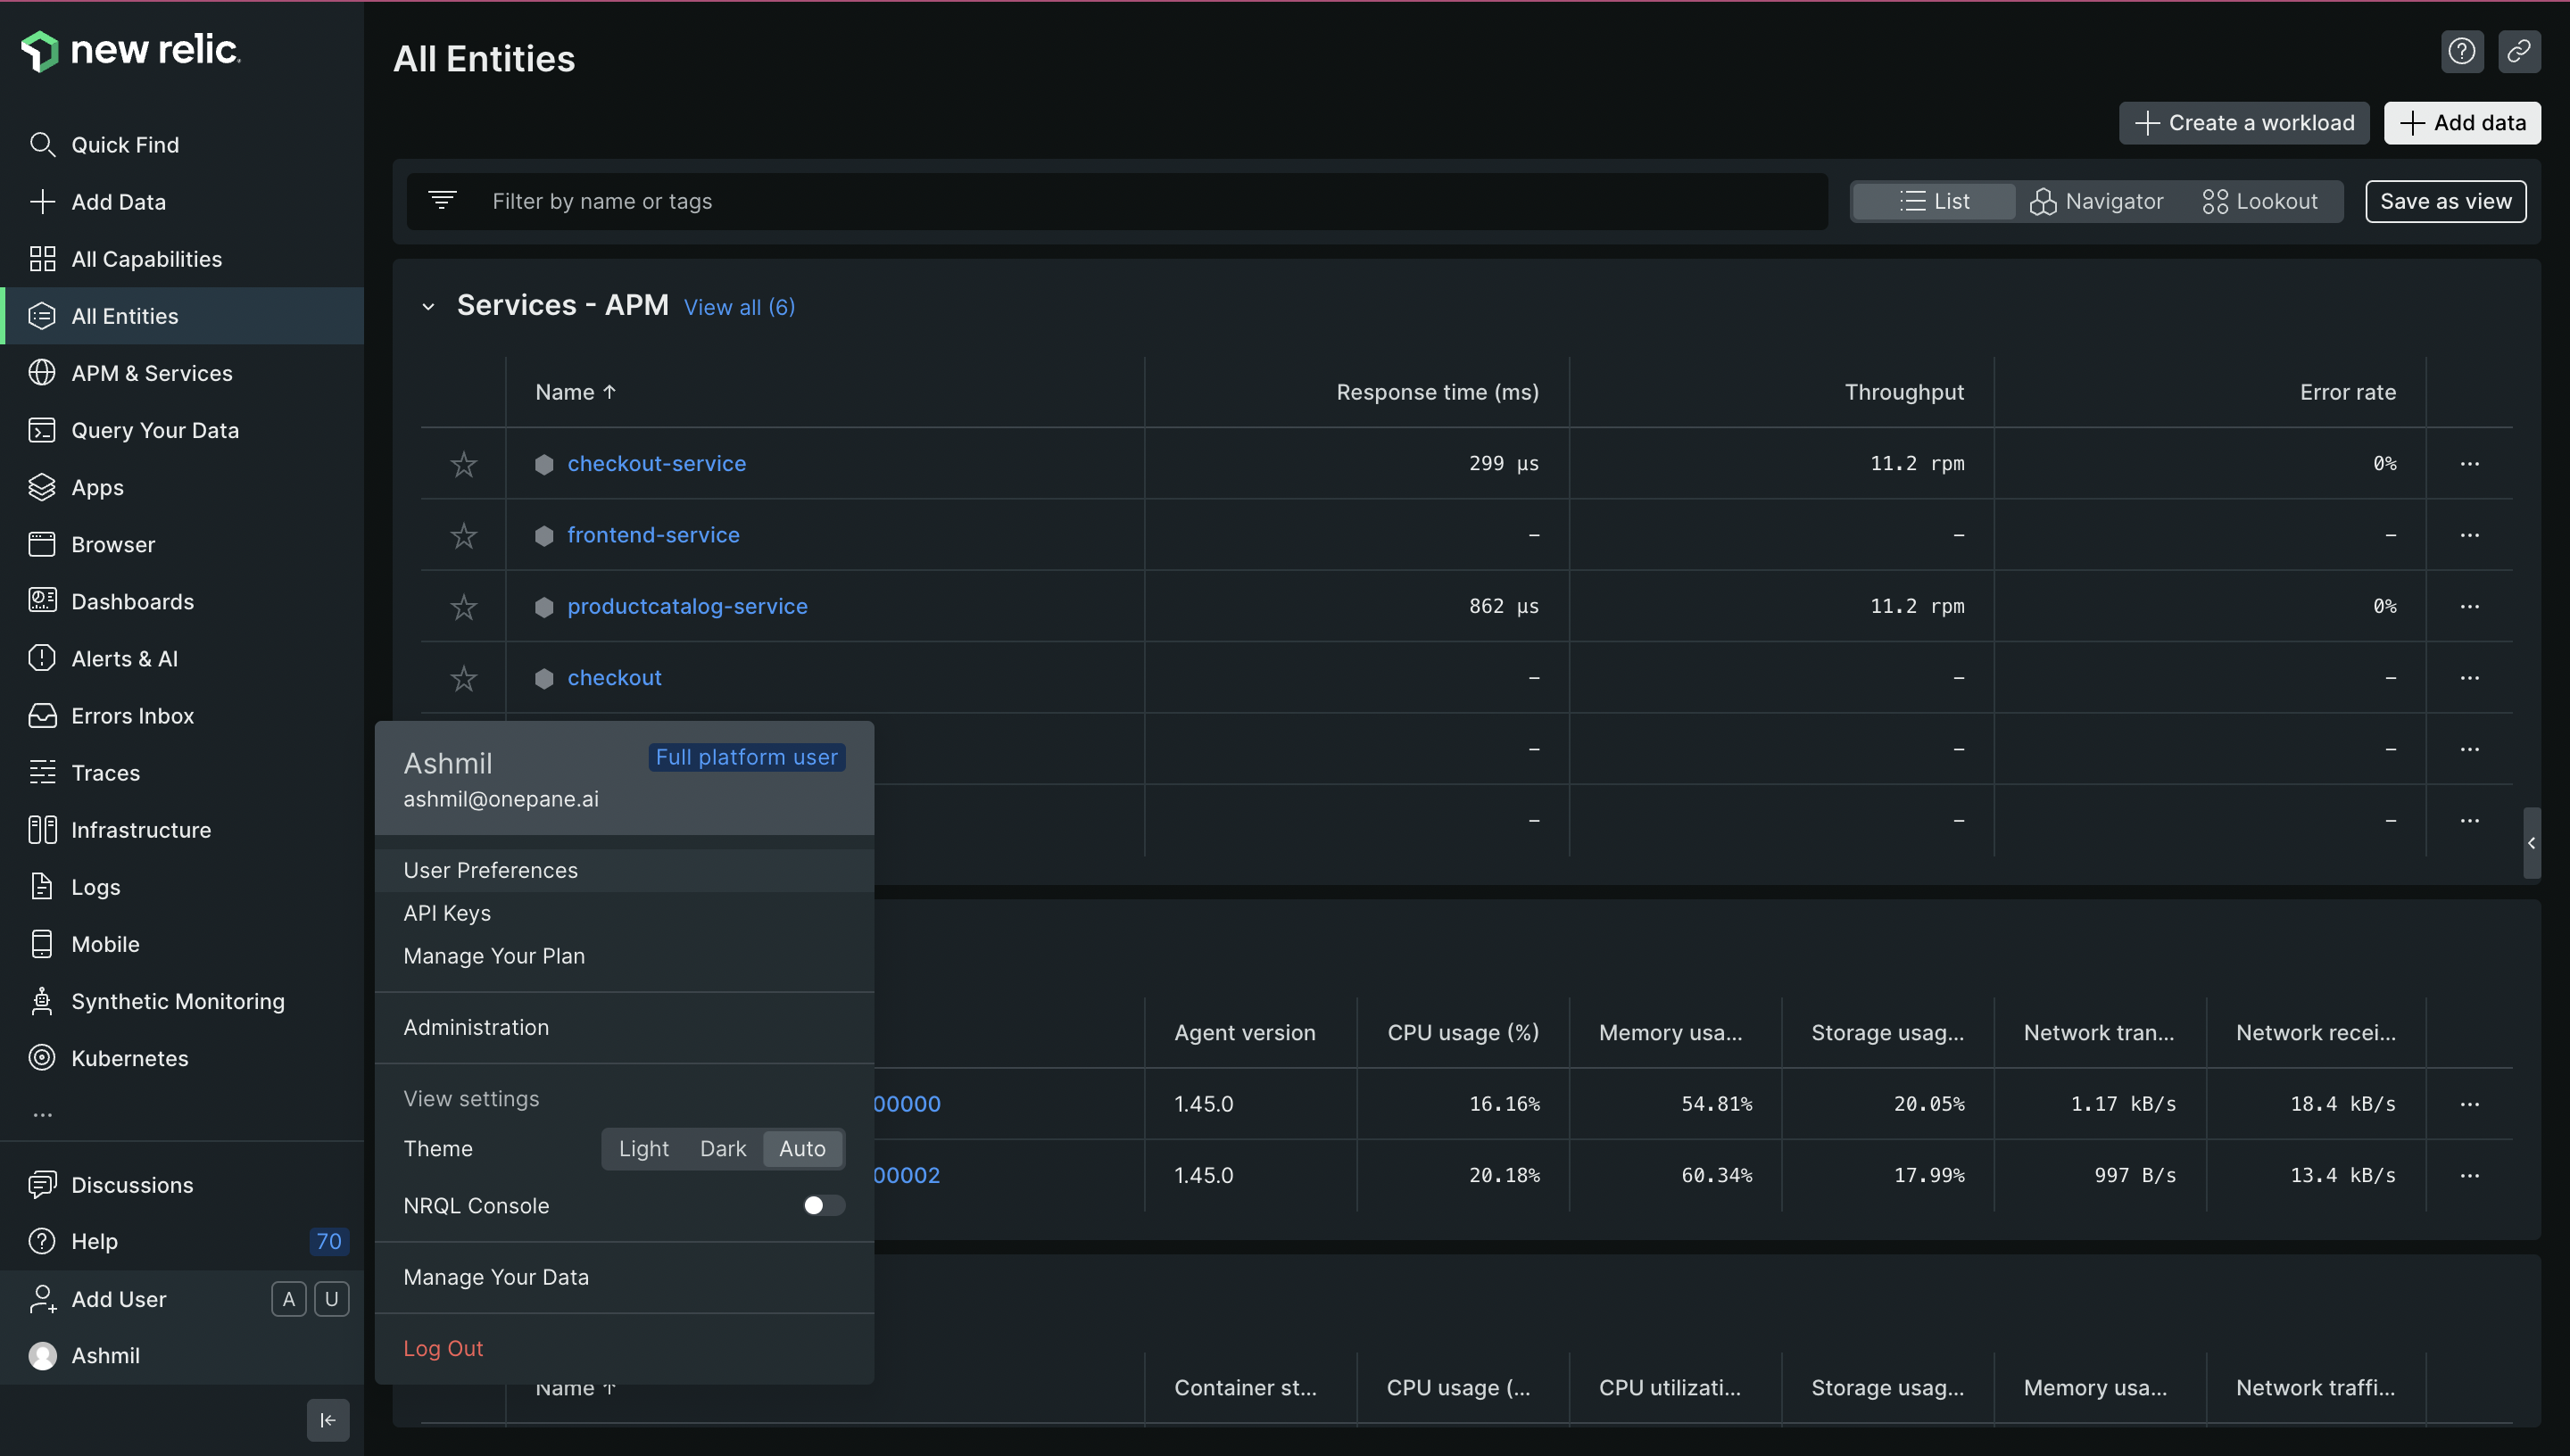
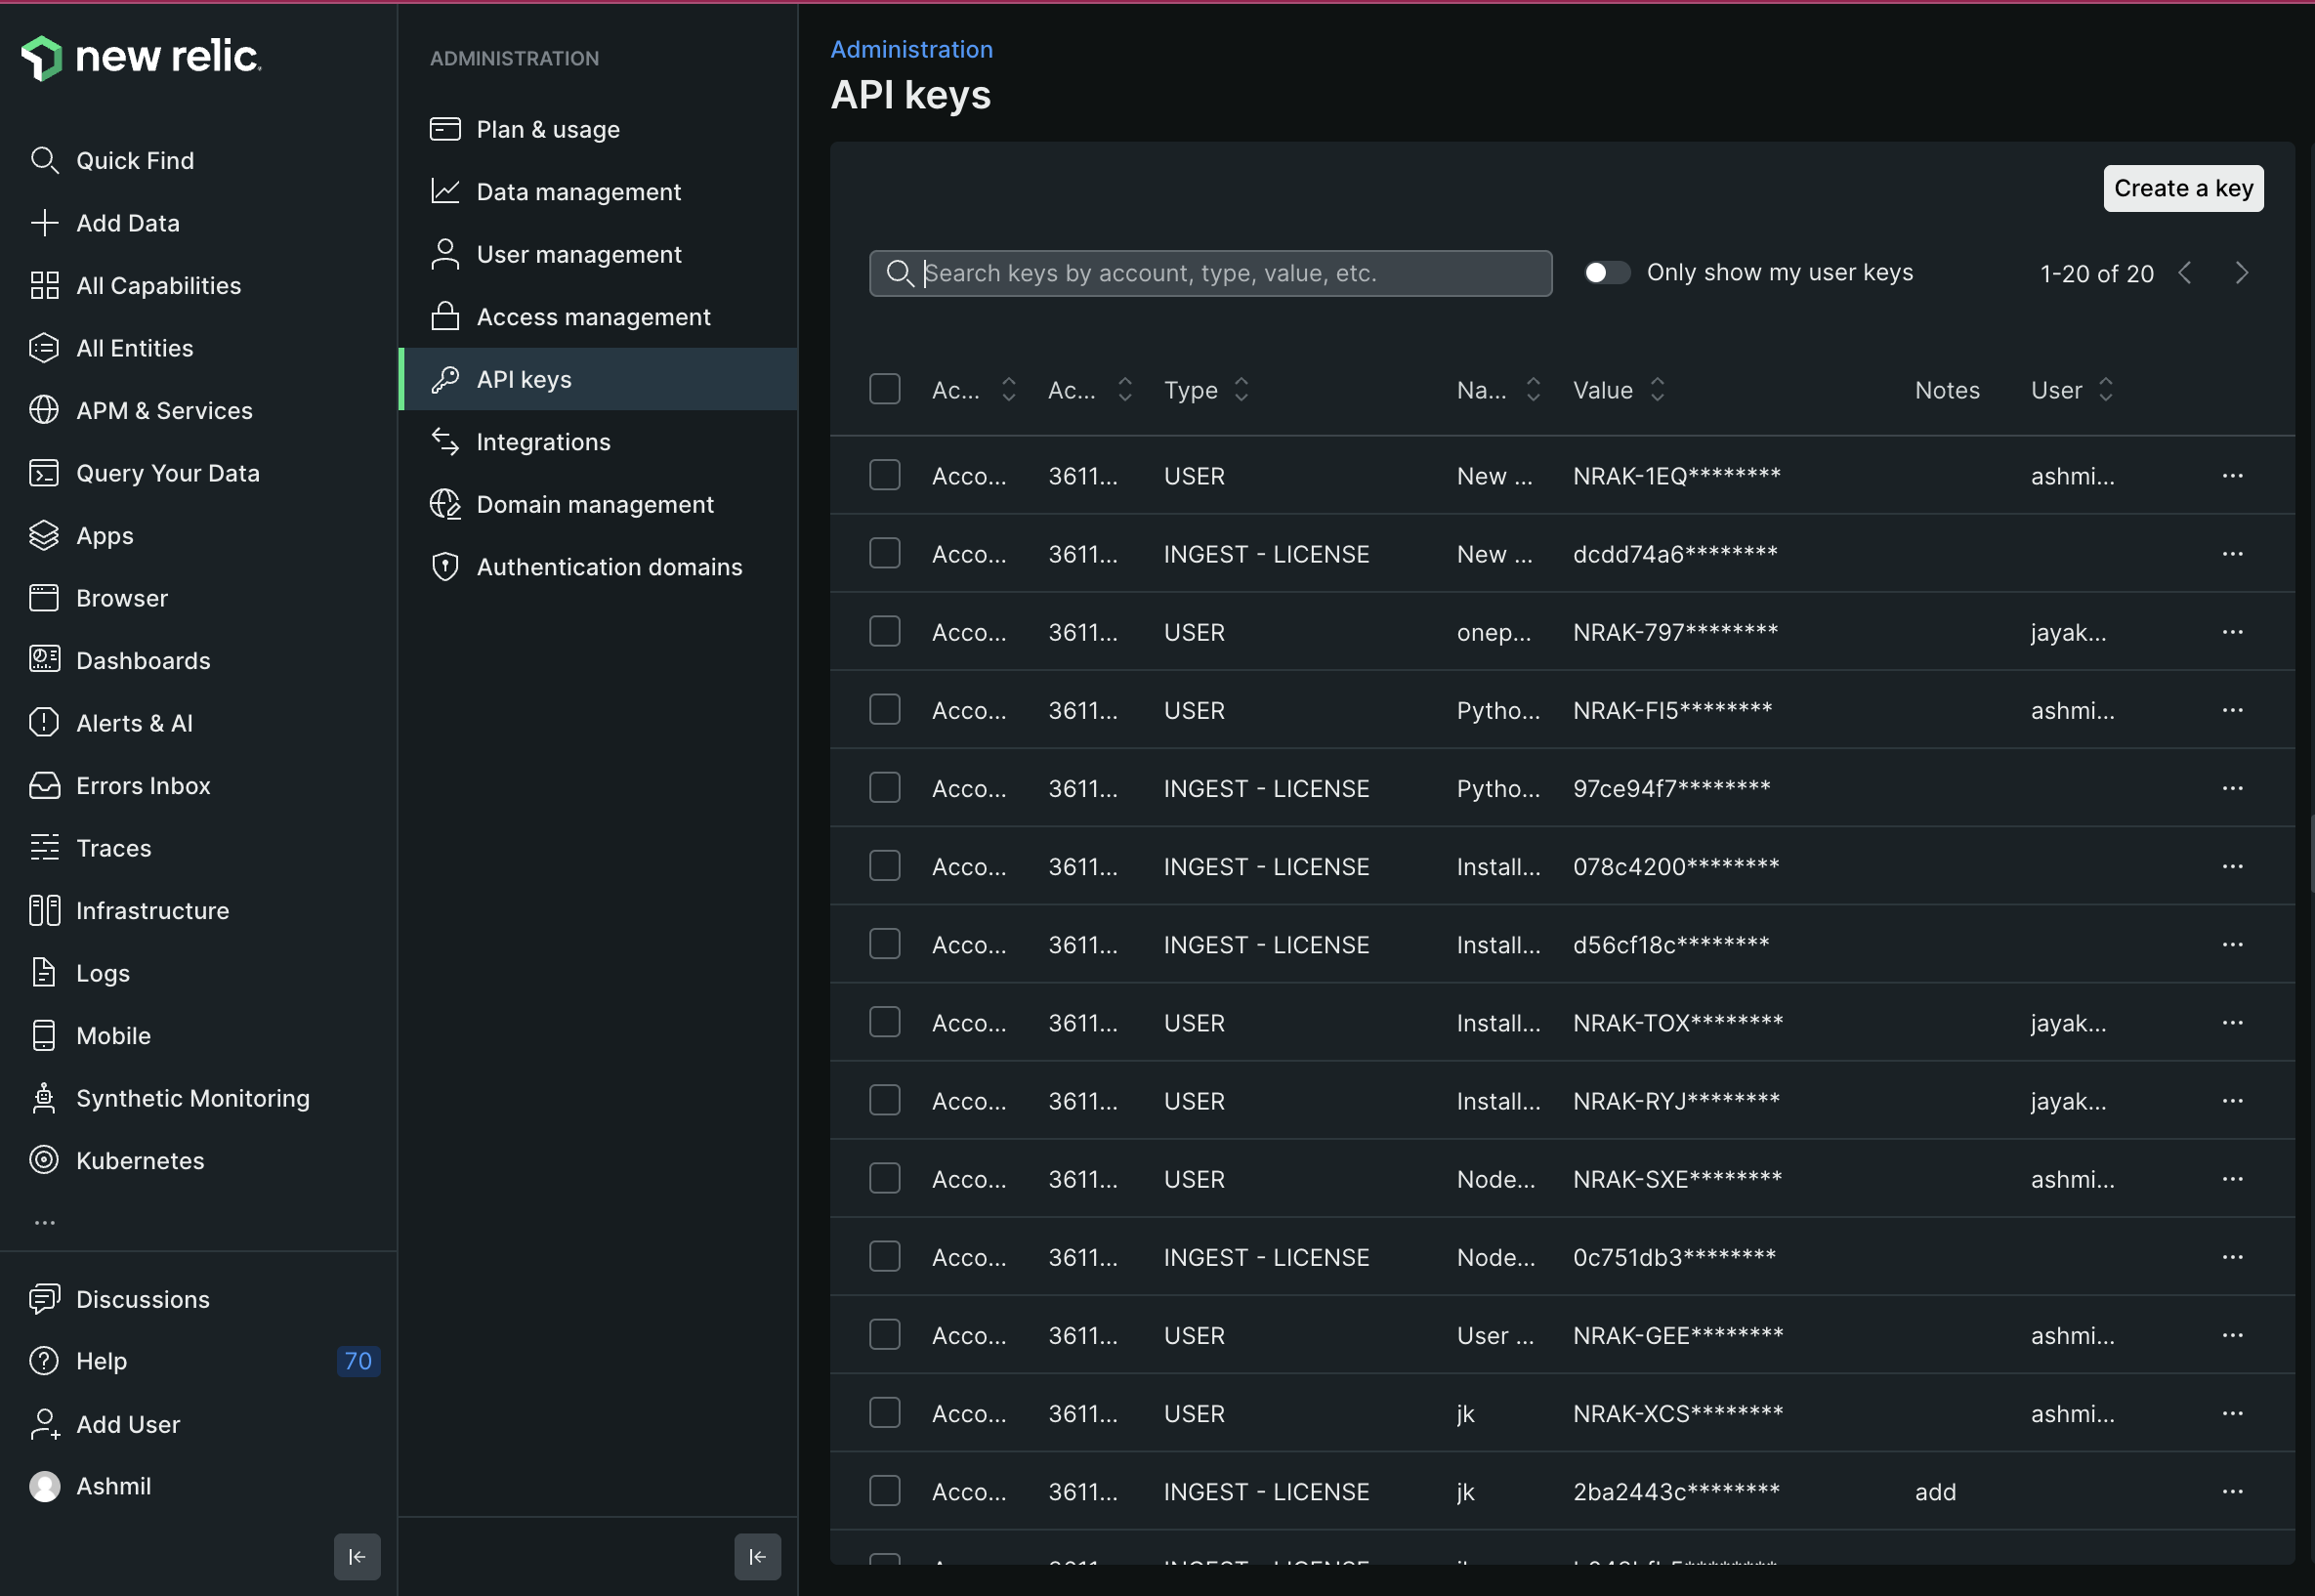
Click on API keys. This will open a window which list all api keys in system.
Step 3: Create a API key
In the API keys section click on "Create key" button.

Key type: Select user for keytype.
Name: Provide a proper name for the key
Notes (optional): leave it empty
Click on 'Create key'
Step 5: Copy the API key
In the api keys window search for you key
Click on the 3 dotes on the right side of the key
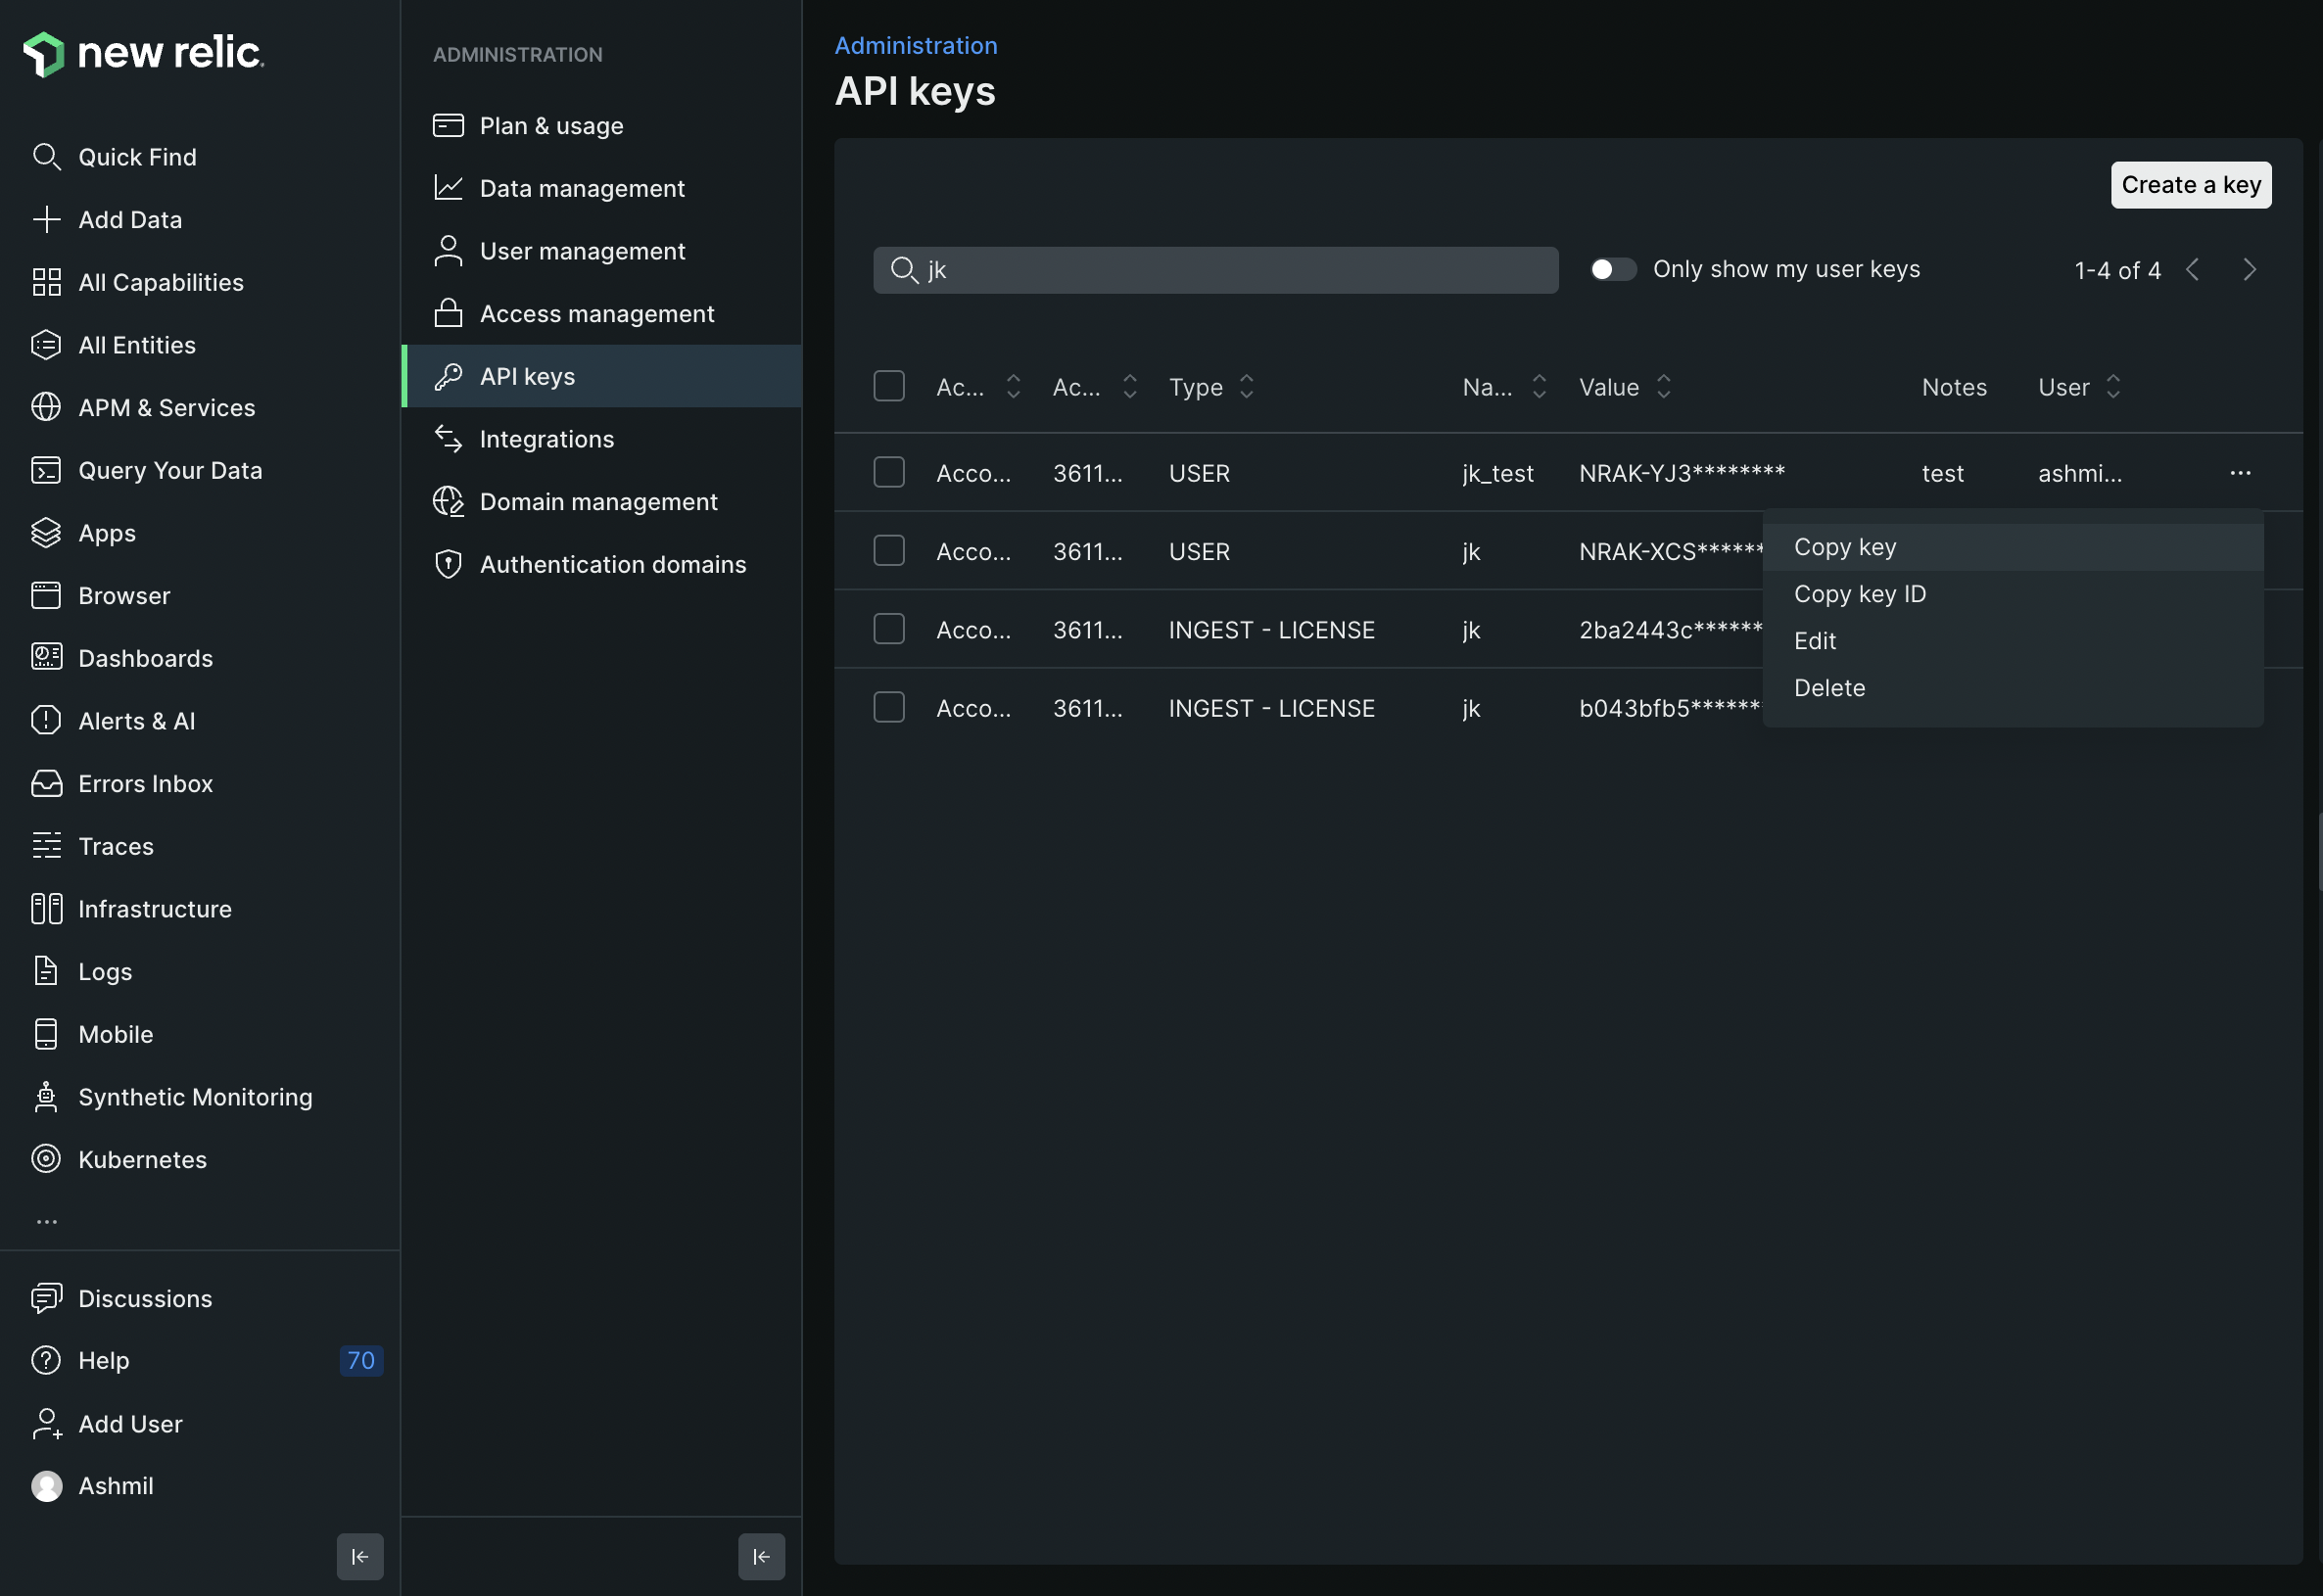
Click on 'Copy key'. And save it on a secure location
Step 6: Create a Ingest license
In the API keys section click on "Create key" button.
Key type: Select Ingest license for keytype.
Name: Provide a proper name for the key
Notes (optional): leave it empty
Click on 'Create key'
Repeat step 5 for getting the key
Step 7: Retrieve Newrelic Details
Goto current application's overview page, note down the following information:
Application (client) ID: click the user menu, and then go to: Administration > Access management > Accounts to see account IDs.

API key: This is the key from step 5
Ingest license: This is the key from step 6
Step 11: Store Application Information Securely
- Keep the keys, including the ingest license, in a secure location. These details will be used to authenticate and authorize your application to access newrelic resources by onepane.
That's it! You've successfully created an API key with the necessary permissions for integrating with Newrelic resources and incident alerts.